Category Archives: FAQs
- Home -
- Archive by category "FAQs"
You can create a vendor account in just 3 simple steps.
First step is to fill the vendor registration form, initiate your subscription activation and generate your subscription invoice, pay your subscription fee and continue to your vendor dashboard to add products.
If you have completed your account setup process and you can access your vendor dashboard, Please follow the following steps to advertise your products on Yellomart.net
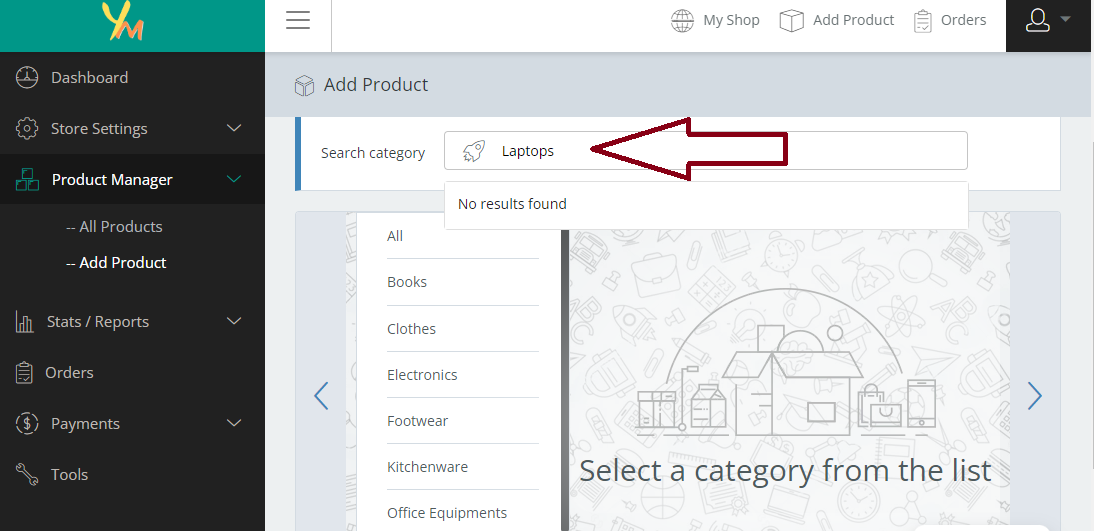
Click on Product Manager in your sidebar menu and select Add Product

Click on the input field in front of Search Category and select the category in the dropdown button provided. If the category you are searching for doesn’t appear in the list, just client on the enter button on your keyboard and click on the Select key that appears as shown in the diagram below


Fill the form with the requested details e.g Product Title, Description and Image or images of the product

Scroll down the same form to add the price of your product. please note Regular price is the price you think the product is worth in the market while Sale price is the price you intend to sell your item. you can leave it blank if it is a negotiable item. Change the Tax status to None and leave the Tax class on Standard.

Click on Inventory and Select Manage Stock to determine the quantity of item you have available to sell. Once you have set this, your product is ready and you can click on the submit button to send your product in for review by our administrators before publlishing.


